I’ve been playing with my Christmas gift. My husband bought me a Cricut Air Explore Two for Christmas this year and I could not be more excited about it. I made the sample project right away but forgot to insert the scoring blade when prompted so it tore when I tried to fold it. I wouldn’t say it has a big learning curve though – you just have to remember to follow the instructions.
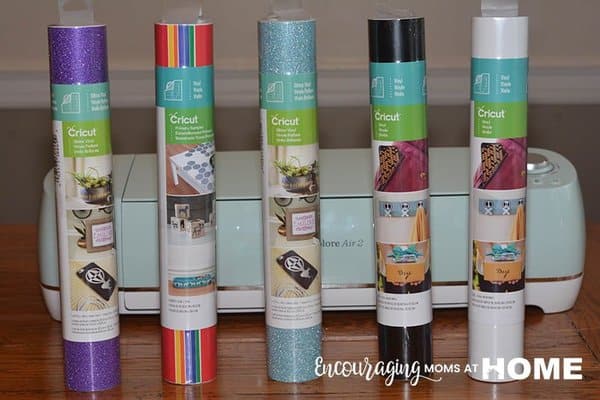
That being said, I watched about thirty videos and have been working to get my first “real” project just right *before* I actually use any products in the machine. A bunch of the Cricut supplies have been 30% off this week so I decided to stock up on a few things I found out were important.
My first project will be wall vinyl. I’ve been wanting to get some key Bible verses up on my wall for a long while. I’m so excited to get this done! Of course, we are thinking about moving and if we don’t move we plan to paint – so there is that. And we started looking in Craigslist at big hutches for the kitchen/dining room too, so that might affect my available wall space. The good news is that if I mess up I can console myself with getting a second chance to apply the vinyl in a few months!

So – I want to put this saying up on my wall – and came up with the font choices all by myself. Although I did ask Clara and my husband for font approval too, just to be sure. I have it all set up to be about 4 feet wide and 2 feet tall. I’ve watched a couple key videos on the Cricut site over and over. I set up my graphic and split it into 8 11″x 11″ sections for cutting and *now* know all about transfer tape and painters tape to get it all set up and transferred to my wall correctly. I even made a mock-up (shown above) to make sure it would look the way I want it to on my wall!
But I’m still so nervous!
That being said, in the process of watching all the videos I did learn about quite a few things that I needed to have on hand before I started my first vinyl project with the Cricut. So without further ado, here is my list of ten things to purchase and get ready before your first Cricut project – no matter which project you choose. And as soon as I actually get up my nerve and get this puppy up on the wall, I’ll be posting about that too!
Cricut Vinyl. Let’s face it, you are going to want to do one or more of the adorable projects you can do with this sticky vinyl stuff in all the fun colors. You should just get a few rolls to have on hand so that as soon as you can access Cricut Design Space you can get started playing!
Cricut Transfer Tape. One of the most important things to get before a Cricut vinyl project of any type (wall or otherwise) is the transfer tape. It’s kinda like contact paper except better and allows you to carefully transfer your vinyl design directly from its backing to your wall without ever actually peeling (and therefore stretching) your design. It’s pretty amazing stuff. I recommend watching the transfer tape videos several times.
Painters Tape. I saw a hint mentioned briefly on one of the videos that I thought was brilliant. When you are hanging a large design on a wall, the design will have to be cut in 11.5 wide sections maximum. To make sure they are all aligned correctly when you move them to the wall, use painters tape affixed to the wall as a hanging line guide so that all the pieces line up and are straight! So glad I saw this tip before I tried my project!

12 x 12 AND 12 x 24 Cutting Mats in all strengths I’ve been thinking about it, and I think I’m going to redo my project with 11 x 22 cuts instead of the 11 x 11 cuts I currently have set up. This would allow me to hang the entire height of each section at once so that all I have to do is line up the top with painters tape and the bottom is there. (I originally had it set up in two rows with eight sections total.) This will make a lot more sense when I post the tutorial, but for now let me just say – if you plan to do large wall art with vinyl or any other large projects you should get the larger size cutting mat right off the bat.
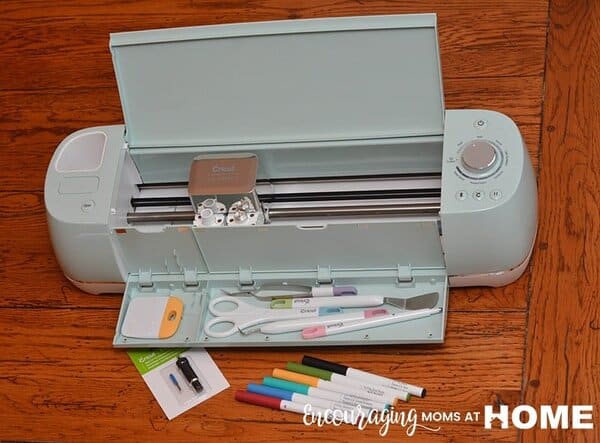
The Tool Set. When we were shopping for machines, we did have some debate about whether to get the machine without the tool set and buy tools later, or just get the whole big package. I’m so glad we opted to get the complete package with tools included! Things like the weeding tool, the scraper, and the cutting board are not really optional. A few things like the marker and the vinyl and the scoring tool they include are optional but they also give you a few more choices for your first project. So make sure you get those tools!
Cricut Sticker Paper. I knew for a fact that I was going to want to start making stickers, so I picked up a package of the Cricut sticker paper at my local craft store before Christmas. (And yes, my husband told me what I was getting ahead of time. Some of use have trouble keeping secrets.) That being said, the craft stores won’t let you use coupons on Cricut products so I’ve since found it better to shop directly on the Cricut site when they are having a sale.
12 x 12 Card Stock in a variety of colors. I thought I had tons of leftover card stock from my scrapbooking days, but when it came time to make a project I realized that most of what I have is actually printed designs. These papers will work with the “light” cutting mat but are not really the right thickness to make a card or poster. They are more for embellishment. So when I tried to download and make my first card project I didn’t even have the basic colors I needed to make it look right! You don’t have to buy Cricut brand card stock, but it is better if you have 12 x 12 card stock in a nice variety of colors before you break the Cricut out of the box. You’ll be able to hit the ground running that way!
A Measuring Tape. I realized very quickly that creating your own designs for the wall would include knowing how much blank wall space you have and where you want your vinyl to fit. I’ve been keeping a measuring tape on the kitchen counter so I can measure and re-measure my spaces ever since Christmas! I’m pretty sure one of my husband’s gazillion measuring tapes is going to magically work its way into my permanent Cricut supplies.
A Variety of Adhesives. Pop dots are a popular suggested adhesive for many of the projects that I found I couldn’t make because I didn’t have the right supplies. Other recommended adhesives include tape runners (a scrapbooking supply), spray adhesive, and tacky glue.
Artwork. You are going to want to print something right away, and you can get a free two-week trial to use the Cricut Access for free. But, make sure you don’t do what I did and activate your two-week trial right before you leave for vacation and can’t use it. And if you want – play with creating some of your own designs in Picmonkey or Photoshop.
Get 10% off of accessories and free shipping at Cricut here!


I was eyeballing Cricuts during a recent sale, but I don’t think I’d use it enough to justify the cost. Looks like fun, though! I wish a local friend had one so I could play with it a little.
I can understand that. Besides wall vinyl, we are looking forward to using the Cricut for making cards, other types of home decor, stickers, and even a few things for homeschooling — like alphabet letters to craft with for preschool. But it is one of those things you have to purpose to use if you spend the $$! I was very inspired to use mine more when I visited the home decor section of Hobby Lobby recently!
Hi Amy, wondering if you can use 12×12 cardstock at Michaels or hobby lobby in the machine without it being cricut brand
Looking to use it for 3×6” diecuts of first names for wedding placecards
Yes, you can use any brand card stock in your Cricut. Just watch the weight – some of the heavier glitter ones require different settings.
I recently received a Cricut explore air 2. Do I need to have Cricut access to make my own vinyl labels/transfers?
No, you can definitely make your own without access to the Cricut membership. You will need high quality graphics and fonts and you are good to go.