Encouraging Moms at Home

Tips, Tricks and Tools for the #MomWin

  • Home
  • About Us
    • Contact Us
    • Brand Inquiries
    • Full Disclosure
    • Our Writing Team
  • Homemaking
    • Cleaning
    • Essential Oils
    • Recipes
      • Instant Pot
      • Gluten Free Dairy Free
      • Using Produce
      • Cooking with Pumpkin
    • Nutrition
    • Food Preservation
  • Homeschooling
    • Homeschool Resources
    • Homeschool Encouragement
    • Homeschool High School
    • Special Needs
    • Homeschooling Art
    • Homeschool STEM
    • Charlotte Mason
    • Homeschool Technology
    • Teen and Tween Writers
    • Homeschool Notebooking
  • Teaching Ideas
    • Free Printables
    • MInecraft
    • LEGO
    • Fine Motor Skills
  • Family Life
    • Gift Guides
    • Kid’s Activities
    • Summer Fun
    • Hiking
    • Moving
    • Christian Life
      • Christian Family Activities
      • Scripture Memory
      • Poetry
      • Creation
      • Advent and Christmas
      • Thanksgiving
  • Moms
    • Encouragement
    • Budget And Finances
    • Mom Fashion
    • Date Your Spouse
    • Work At Home
  • Shop
    • My Account

Top Ten Lessons Learned about Making Crayons (Shape Molds)

by Amy Blevins 5 Comments

Posts contain affiliate links. This means, if you choose to make a purchase, I will make a commission at no extra cost to you. For more information please see our full disclosure.
185 shares
  • Facebook2
  • Twitter

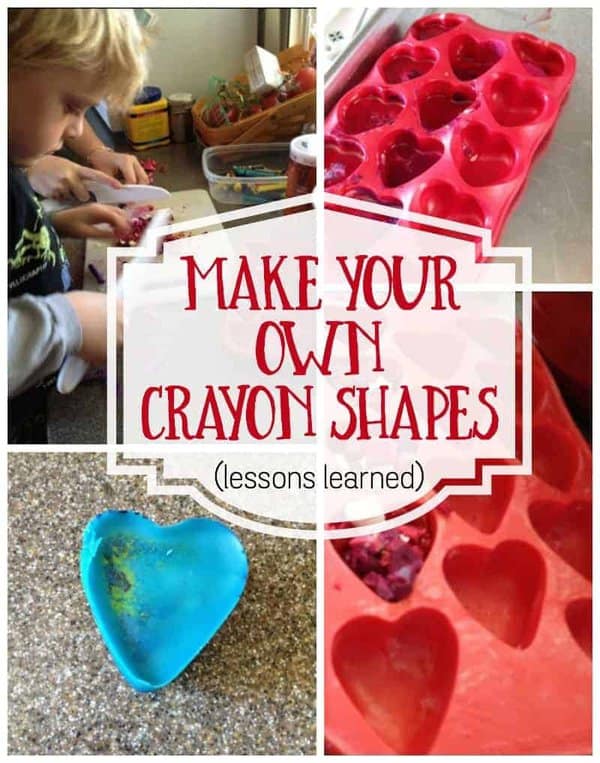
So we tried making our own crayons as gifts for the neighborhood on Valentine’s Day. I read a bunch of stuff online, but frankly following the online directions did not work well for me. So here are a few things to add to the basic directions you will find on line. I’m calling it my Top Ten Lessons Learned (for making crayons in shaped molds).

#10. Make extras, your children will want to keep some.
#9. Use all the same brand of crayon, different brands mixed do not meld together well.
#8. Breaking up the crayons is fine, you don’t need to chop them like we did. Chopping them may ruin your cutting board… (see number 7.)
#7. Be careful which dishes and utensils you use because they will get crayoned.
#6. Use a cookie sheet under your molds, the molds are not stable enough to remove from the oven when crayons are in a liquid state.
#5. Line your cookie sheet with parchment paper. (see numbers 6 and 7.)
#4. Cool thoroughly before removing from the mold. Use the freezer to speed cooling up.
#3. Higher temperatures make grainy crayons. Use lower temperatures (240*) and more patience.
#2. Make extra. No matter how careful you are some will break in the removal process…
#1. Make sure your molds are truly silicone and oven proof. Apparently some molds look like silicone but do not act like it…

Above all else, have fun with your kids! They are here today and gone tomorrow!

Pin This Post:

Looking to make shaped crayons as an art project or gift?  Take a look at these 10 lessons to remember when making your own crayons for holidays or themed days.


Disclosure

185 shares
  • Facebook2
  • Twitter

5 Comments
Fine Motor Skills, Kid's Activities

About Amy Blevins

Amy lives with her husband and six beautiful children in Northern Virginia. Besides blogging, Amy enjoys homeschooling, hiking, reading, singing, teaching, and serving Jesus above all. Welcome.

Comments

    Leave a Reply Cancel reply

    Your email address will not be published. Required fields are marked *

  1. Jennifer says

    February 10, 2013 at 7:15 PM

    The first time we made these (my husband and I before kids) we did everything wrong. Paper muffin tin liners do not come off of round crayons as easily as regular crayon wrappers. I’ll have to remember your tips when we do this again. The kids do love them.

    Reply
  2. David Ritko says

    June 12, 2018 at 2:46 AM

    Cleanup is the biggest task. Parchment paper is great for the cookie sheet, and even on top of the cutting board ( or dedicate a cheap one from a dollar store). Also spray the molds with cooking spray. Don’t use molds that have intricate designs as the crayons get stuck in there. Lastly, the molds will have colored crayon residue. You can use a wood toothpick to rub off the bits that don’t come off with a brush, soap, and hot water

    Reply
  3. MomBoss1719 says

    February 19, 2020 at 7:17 AM

    How do I clean my molds after crayon fun?
    Can I use them for food again?

    Reply
    • Amy Blevins says

      May 18, 2020 at 8:58 PM

      I just used hot soapy water, and I would think if you clean them well they would be perfectly fine for food. I don’t use the molds for food typically.

      Reply

Trackbacks

  1. 100+ Screen Free Activities for Homeschoolers - Thinking Kids says:
    March 24, 2018 at 2:03 PM

    […] Make crayons. […]

    Reply

Get Sam’s Club Half Off!

Search

Keep In Touch

  • Shop
  • Contact Us
  • Facebook
  • Twitter
  • Instagram
  • Pinterest
  • About Encouraging Moms at Home
  • Brand Inquiries
  • Full Disclosure with Privacy Policy
  • Our Writing Team

Kids Can Learn with LEGO Bricks

Our Latest Shenanigans

Follow on Instagram
Copyright ©2023, Encouraging Moms at Home. All Rights Reserved. Custom design by Pixel Me Designs