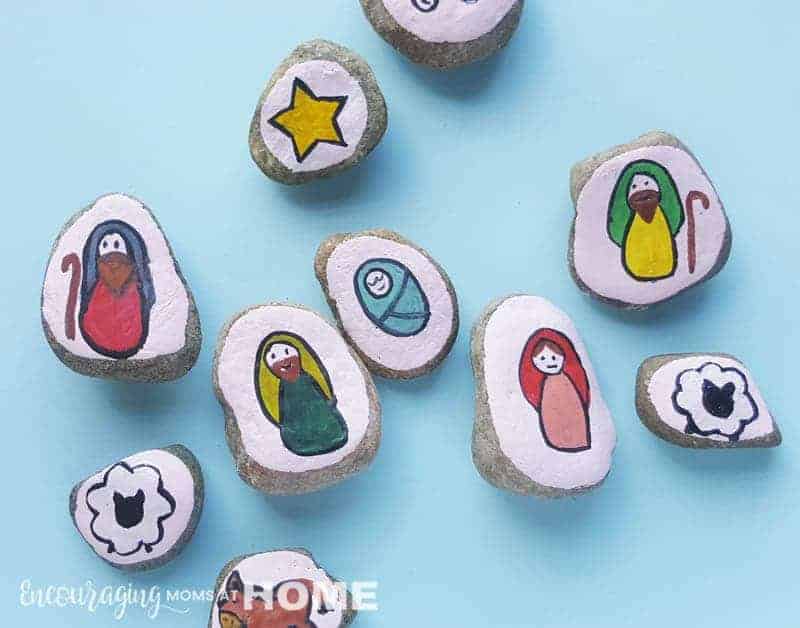
Sometimes, when you tell a story, the simple act of speaking is enough. The words, the intensity of the story, and the heart of the storyteller carry the listener along. Sometimes though, just adding a simple visual touch to your storytelling makes all the difference, especially with little kids and short attention spans. That’s why we like to encourage telling the Christmas nativity story for children with a story stones craft and other fun nativity crafts kids can make.
I love to spend the month of December fully focused on Jesus, our Savior, and the first Advent. We have nightly Bible readings, a giving manger, and several other fun traditions that help reign in our family from all the hubbub and keep us focused in the right direction. I especially love to do activities centered around the Christmas nativity story.

Now, if you have older children, say ages 9 -19, they can make the story stones themselves (perhaps with a bit of help) and enjoy telling the Christmas nativity story for the smaller children in your family and extended family. As long as you keep the paintings basic, following the examples we show here, this is a fairly straightforward craft. If you purchase the stones, instead of using found stones, make sure you wash them to remove the powder and then allow them to completely dry.
Step two is just coating each stone in white acrylic paint. This step is not strictly necessary; many people like to paint their story people directly onto the stones themselves. Once you allow the stones to dry, step four is to draw simple basic outlines for the story characters, as shown below.
If you are going straight on the stone, you might want to use a white gel pen instead of a black one for the outline.

In steps 5 through 13, you are just working in order to fill in the colors and painted outline in the order suggested so that your nativity story stones turn out perfect, just the way you want them.

Because our story stones are sprayed with a clear varnish or finished off with Modge Podge, these stones can be held and touched and passed from one person to the next as the story is told. They can be stored in soft cloth bags or baby socks and kept for use year after year. And they can be displayed beautifully in the center of your dining table or coffee table where the bright colors and happy visuals will encourage frequent use.

Having the story stones accessible for younger children will encourage them to practice storytelling themselves, which nurtures their language skills, verbal and auditory processing, listening skills, and vocabulary skills. You can read more about the benefits of story stones on Happy Hooligans.
To make our nativity story stones, you will need to find some flat stones for painting. We prefer these from Amazon if you do not have access to flat rocks in your backyard. You will also need a nice variety of acrylic paints in bright colors and skin tones. A black gel pen, Modge Podge or spray varnish, and small cloth bags for storage will also be needed. Baby socks work perfect for long term storage!

Paint These Nativity Story Stones
Ingredients
- Stones or rocks
- Acrylic paint in a variety of colors
- Paint brush
- Black gel pen
- Clear spray-on varnish or Modge Podge
- Small cloth bags or baby socks for storage
Instructions
- Select stones or rocks from outdoors or purchase a set of painting stones on Amazon. Stones with relatively plain surfaces are best for story stone painting.
- Apply white acrylic paint on the top surface of the stones (optional).
- Allow the paint to dry.
- Use a black gel pen to draw the nativity figures on the white painted stones. Keep the figures nice and simple.
- Select a stone with traced figure on it; select paint and grab the paint brush.
- Fill the traced drawing with the selected paint.
- Use a thin paint brush (“0” or “1”) and paint a thin outline using black acrylic paint. This one was easy. Let’s try something a bit more difficult.
- Here’s a stone with a shepherd figure.
- Select 2 different colors and paint the clothes of the shepherd first.
- Now paint the beard and the stick using a thin brush. Allow the paint to dry before going to the next step.
- Grab the thin paint brush and black paint; trace the outline of the painted shepherd figure.
- Follow the same steps to draw and paint the other similar figures (Mary, Joseph, other shepherds).
- Painting the sheep and donkey are also easy. Trace the figures using black gel pen, fill the traced figure with paint, and then use black paint to trace the outlines.
- Done painting? Allow the paint to dry completely.
- Spray the stones with clear varnish or coat each stone with Modge Podge on the painted surface.

[…] With six kids, I’ve done a lot of Christ-centered Christmas crafts over the years with kids. As the mom, I find myself wanting something a little different each year, I think it helps keep the kids engaged and excited to craft with me. I’m in love with this sweet clay nativity in a matchbox and think your kids are going to love it too. If you have kids in the perfect age range (8-13) for this craft, they will also love our nativity story stones. […]