With six kids, I’ve done a lot of Christ-centered Christmas crafts over the years. As the mom, I find myself wanting something a little different each year; I think it helps keep the kids engaged and excited to craft with me. I’m in love with this sweet clay nativity in a matchbox and think your kids are going to love it too. If you have kids in the perfect age range (8-13) for this craft, they will also love our nativity story stones.
If you have kids ranging in age from 8 to 13, this clay nativity in a matchbox is the perfect Christmas craft for them! It does have instructions to use an xacto knife, but scissors would probably work; or, you can provide a little bit of oversight. I like to do crafts with my kids, so this isn’t an issue for me. If your kids are a little on the younger side, they can make their own clay nativity in a matchbox with your help for some of the steps and will love carrying it around and sharing it with random people in the grocery store or everywhere you go. You’ve been forewarned, lol.
Our clay nativity in a matchbox requires one matchbox per child. If you have several kids and need a box for each, but don’t want to have six boxes of matches without nowhere to put the matches, you can buy several empty slider boxes on Amazon. I love this option! You can cover your empty matchboxes in colored paper, or if you get the plain ones I linked to, you can also leave them plain or decorate with markers/stamps.

I just love how these little nativities turn out, and they can be kept from year to year! You can also have your child practice narrative speech or conversation, telling the story to grandparents and relatives and friends during the Christmas holidays. Your kids will be so proud of what they’ve created.
If everyone wants, you can even make a little box for shepherds with an angel too. You can print out the instructions for our clay nativity in a matchbox craft and take it with you shopping for supplies. Just click on the little print button.
For an awesome list of Christ-centered Christmas crafts, be sure to check out our amazing, well-organized list of nativity crafts. I refer back to it every single year!
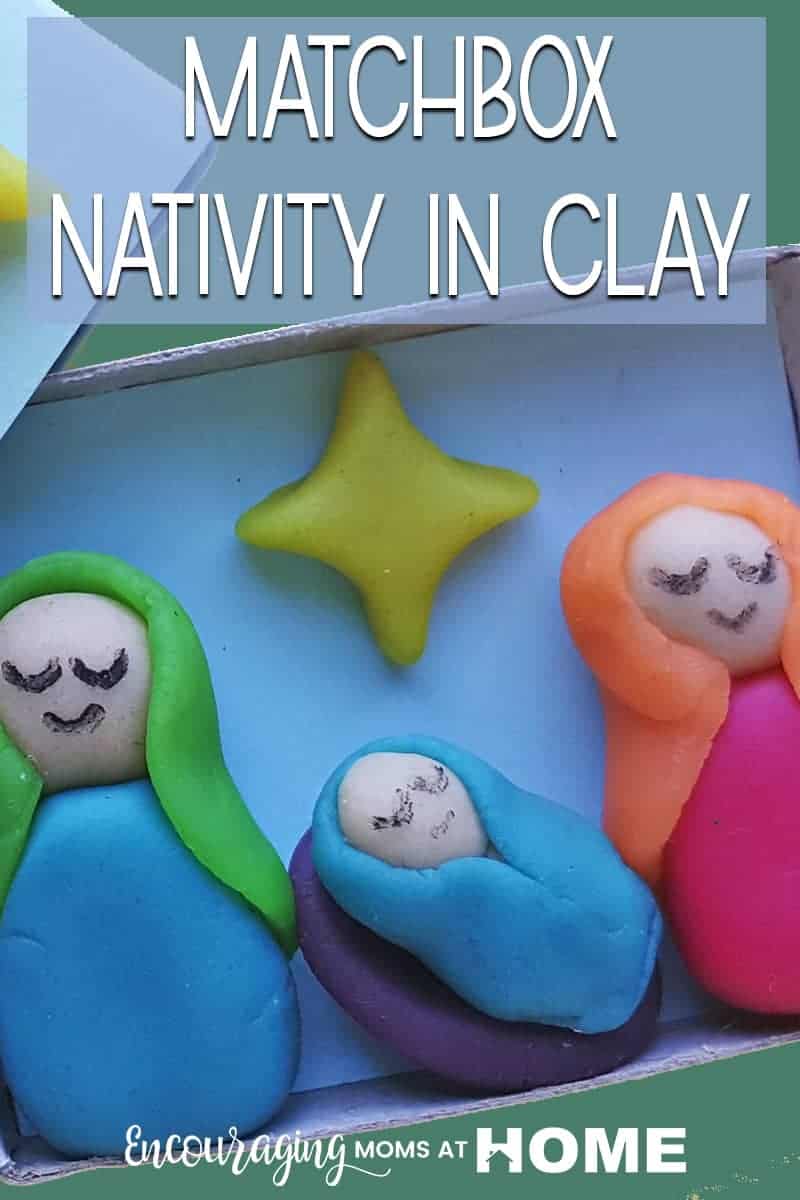
Clay Nativity in a Matchbox Christmas Craft for Kids

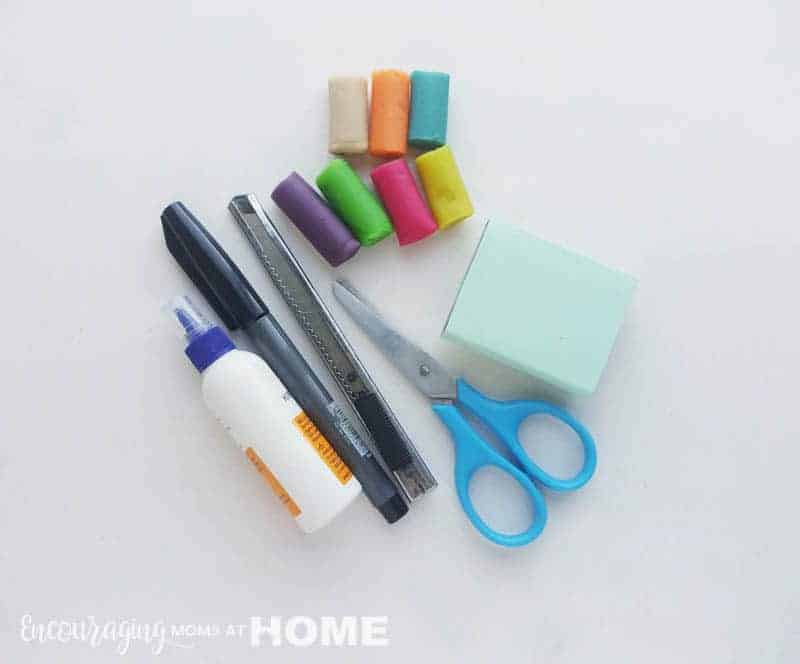
Ingredients
- Polymer clay
- Matchbox
- Colored craft papers
- Craft glue
- Scissors
- Black gel pen
- X acto knife
Instructions
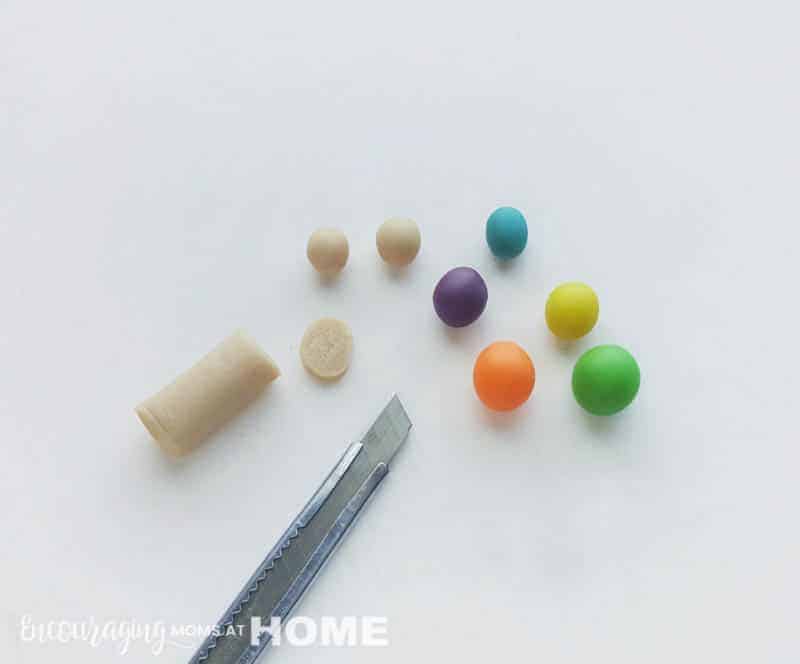
- Select different colored clay for this project. For all figures, we need to make a ball shape first. Use an x-acto knife to cut out a small amount of clay. Roll the clay to make a small ball shape. Similarly cut out more clay and roll them into ball shapes. Make 2 ball-shaped clays of relatively the same size (to make the heads of Mary and Joseph) and make 2 relatively smaller ball-shaped clays to make Baby Jesus.
- Select colors for the clothes of Mary and Joseph. Grab double the amount of clay used for making the heads and roll them into smooth ball shapes. Roll them both on a plain surface to create a pipe-like pattern; these will be the clothes of Mary and Joseph.
- Attach the clay heads on the top ends of the clay clothes for Mary and Joseph.
- Select 2 more colors for the scarves; grab the same amount of clay used for the clothes. Roll the selected clay into balls shapes and then flatten them using any object with a plain surface.
- Place the head attached clothes figure on the flattened clays; Keeping a cm of the flattened clay outside on the top side.
- Wrap the figures with the flat clay from the back side towards both sides.
- Flatten another clay ball for the baby Jesus. Place the 2 small ball-shaped clays on the flattened clay.
- Wrap the small ball-shaped clays with the flattened clay from both sides and bottom. Cover one ball-shaped clay with the flattened clay and make sure that the other is visible.
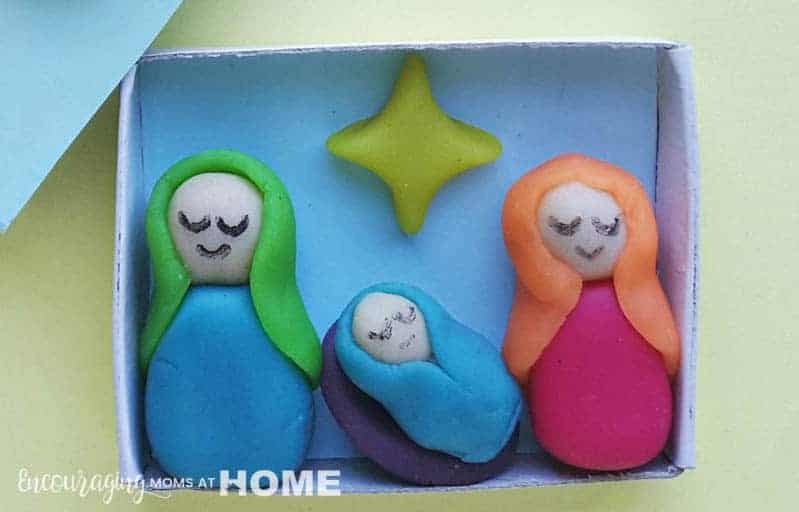
- Use black gel pen or paint to draw the faces of Mary, Joseph, and baby Jesus.
- Select a color for the star and roll the clay into a ball shape.
- Press the ball-shape from 4 sides to make a 4 point star pattern. Bake the prepared figures according to the instructions of the clay package.
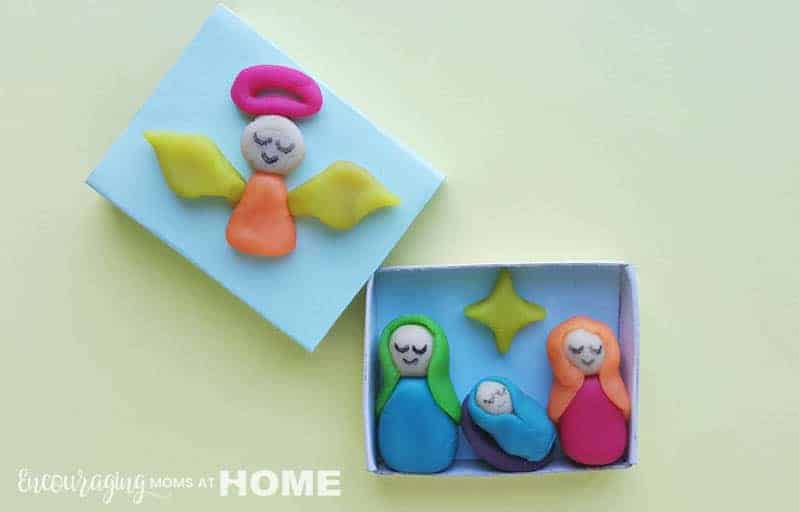
- Cover the matchbox with colored craft papers. Place the prepared clay figures inside the inner box of the matchbox
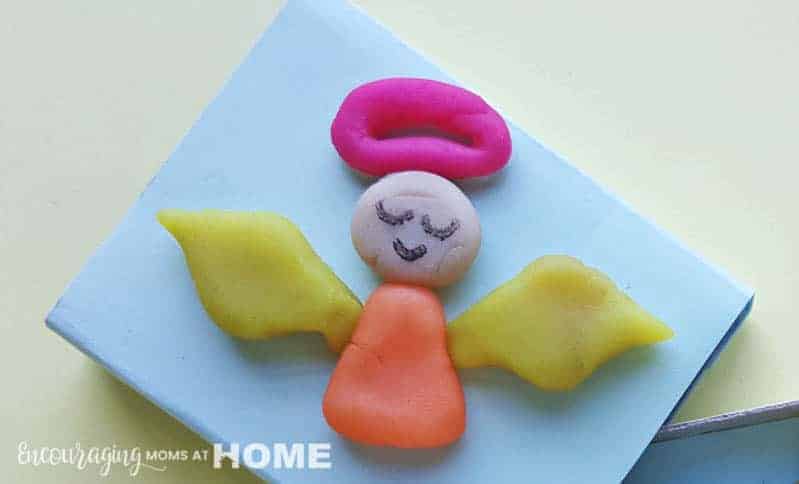
- Make an angel using any colored clay you want. Make the wings, body, head and headband. Attach all parts together and bake accordingly.
- Attach the angel figure on the top side of the outer box of the matchbox.


SO cute! I’m saving this and sharing it for when my grand-toddler is older or I can visit my older grandkids. Thanks for a lovely idea.
This is soooooo cool, christmas is gone but we can still play this…….. Great idea